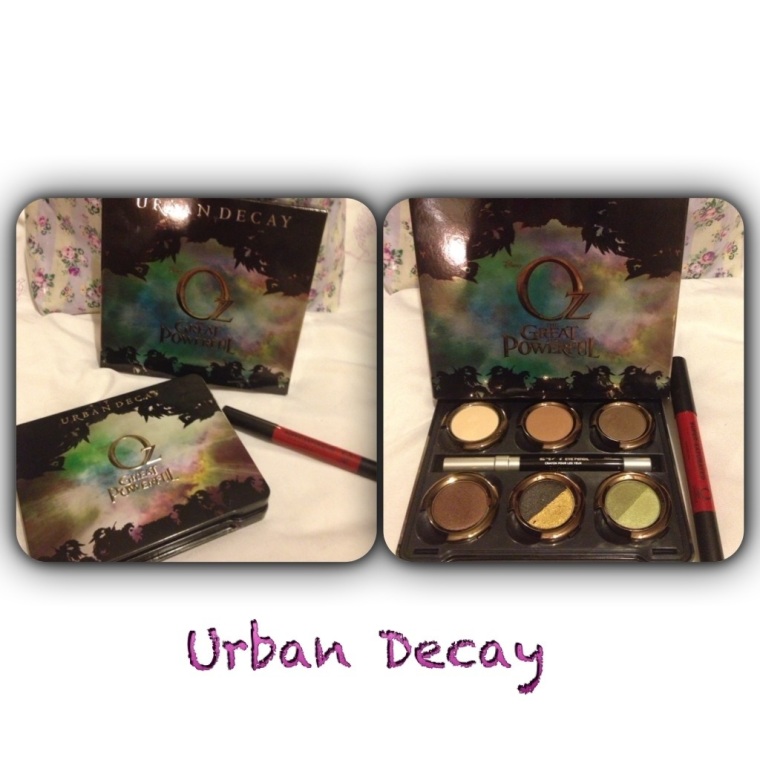
Urban Decay Theodora Palette

I am a major fan of Urban Decay for as long as I can remember. I have very few Mac shadows in my kit, unlike most other MUA’s who seem to love it, but it’s over loaded with Urban Decay…..palettes, single shadows, liners….far more than ill ever use, but there is not one thing in that case, that I could stop myself buying. I even bought the Alice in Wonderland box in bulk so when the time came to throw one out, I’d never have to be without!
When I seen the latest palettes to be released, I resembled a 2year old on Christmas morning!
“OZ, The Great and Powerful”, and not 1 but 2!! 2 completely different palettes, with completely opposite colour, my mind went into overdrive. The need to have these new toys almost hurt, I craved them. And I was not to be disappointed!
My hubby suprised me with both palettes the day before their offical release here in Ireland and I nearly passed out with excitement. That little boy in Charlie and The Chocolate Factory opening his wonka bars didnt come close to the sight of me tearing those boxes open!

20130225-205045.jpg

The first of the 2 palettes that I tried was The Theodora. 8 beautiful shades, 4 single, full sized shadows and 2 split shadows. All shadow pots can be clipped in and out so you can customise an empty palette with some of your favourites. The palette also came with Theodora super saturated high gloss lip colour & 24/7 glide on eye pencil in black.

Here is a brief description of shades from top left-bottom right:

BROKEN- A creamy vanilla/pale beige with a satin finish. It applied very soft and smooth.
BEWARE- A medium caramel/soft taupe colour. Matte finish. Applies well and very easily blended.
BEWITCH- A darker brown shade. Applied more powdery but colour was very true to pot.
WEST- Very rich deep brown with burgandy undertones, very intense pigment in this one so apply lightly.
SPELL- This is a split pot. First half is a beautiful metallic antique gold with glitter pigment, not a lot of glitter transferred onto the lid, seemed to get lost in fall down.Colour is true to pot though and looks amazing applied to the tear duct when using the darker shades. Second half is a really intense chocolatey/ almost black with multi colour glitter pigment. Has a lovely smooth texture and applied really well.
Jealous- Another split pot. First half is a zesty apple green, I love it! Applied really smooth and had a gorgeous soft sheen finish.
Second half is a deeper olive green, it has really strong pigment, applied smooth and built up really easily for a stronger shade.

The liner is a coal black creamy glide on that can be smoked really easily if desired.

Lastly, the lip colour. It is a really strong red, beautiful in colour, and equally beautiful to use. Rich and creamy texture,very stong pigment. Use with a liner and blend as its very buttery, so can run over your natural lip line very easily.

I fell in love with every single colour in this palette. They all applied really well, the colour lasted 6+ hours without a primer and its a perfect day to night must have. I would recommend it to everyone that wears these shades on a day to day basis. They are rich, luxurious and money very well spent, when you consider that the pots are all full sized (apart from the 2 split pots, but the colour in these pots would not be used as much as the other 6).The pigments are strong, which means you can apply lightly and have this in your make up bag for a long time to come.
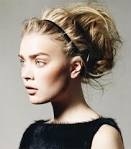
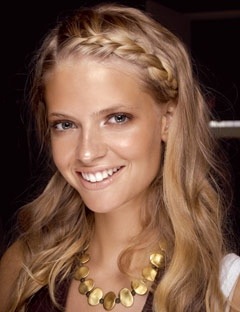
The Messed Up Top knot!

This is by far, one of the easiest looks to create and works for all seasons and outfits!

Prep your hair by creating a wave, either with sea spray, ghd or wand. Make sure the wave is loose and natural looking.
Tie your hair into a loose ponytail. Back comb the ponytail lightly to create more fullness. Start to randomly clip small bunches of hair working around the ponytail. Don’t overuse the clips, you want to keep the messy look. When all of the ponytail has been clipped up, scrunch the hair with your fingers to toss and loosen.
Place your fingers on the scalp around your front sections and massage in a circular motion. This will loosen the hair from the scalp.
Single strip elastic hairbands are available from Pennys. Use 1 or 2 to define the front.
That’s it!!
If any if you try this out, let me know how you get on

20130509-150337.jpg

Day 3. Simple Summer Hair!

Messy hair is a must have, for Summer ’13, so before I get started on some tutorials, here’s a quick guide to getting your hair prepped for that windswept, beach babe look!

Surfer chic waves.
The one sure fire way to create this tossed up, natural looking wave, in any hair type is to use a salt spray!!

20130508-233942.jpg

This spray is perfect for adding texture to the hair and as salt is quite drying, it will set the waves perfectly.
I use the Surf Spray by Bumble & Bumble, but for a cheaper alternative, Boots stock a wide range.
Or, even better again, for a free alternative, you can make your own!
Simply mix up 8 fl oz of hot water, 1-2 tbs of sea salt and 1/2 tsp of conditioner! Pop your mixture into an empty spray bottle (available from Boots), shake up and get spraying! You can also add a few drops of lemon juice if you have blonde hair, which is a natural lightener, or you can add a few drops of your favourite essential oil for a nice, fresh scent.

Shampoo the hair and brush it through, coat all the hair from root to tip with your chosen spray and scrunch up with your fingers.

I would recommend leaving course, naturally curly or frizzy hair to dry naturally.
And for fine or straight hair, put your hairdryer on medium heat, medium power setting and remove your nozzle, then just Scrunch dry using your hands.

For an extra lift, re spray the roots of the hair when dry, and massage while giving a quick blast of your dryer. (Again, nozzle free)
That’s it, nice and simple. The spray will set the wave firmly so you don’t need to use any extra products. Just walk confidently, looking like you have just stepped off a surf board!

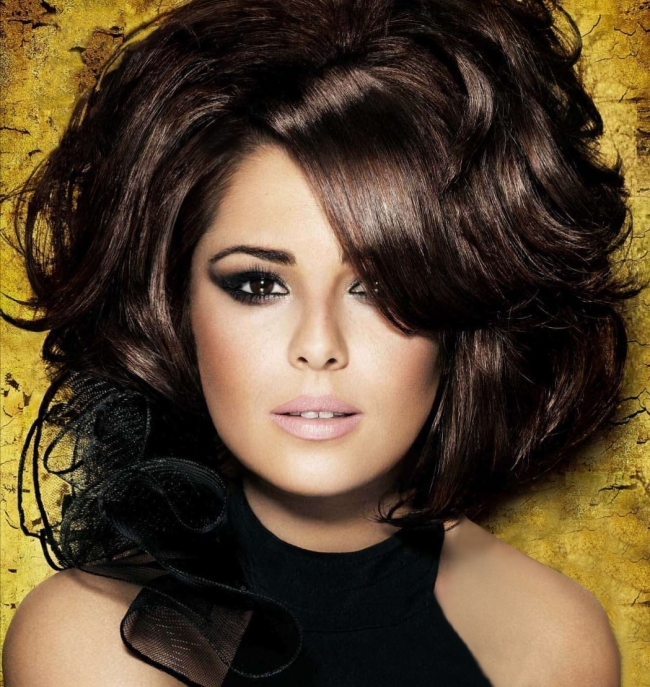
Big Hair & How to achieve it

Big hair has been around for years, it will never go out of fashion and for some of you out there, with fine, oily and generally flat hair, this look seems impossible!

And so I’ve composed a few little tips that I find helpful, when I am working on creating full and fabulous locks, with these hair types. I have also included some products that I find work really well for “puffing up” those roots. x


*Getting the Perfect Base. 

Maintaining body in your hair, lies in the way that you blow-dry it. If your pulling it straight and flat, its too much work to try and reshape it when its dry! When your blasting that “heavy wet” from your hair after washing, try doing it with your head held upside down. Drying your roots in the opposite direction to the way that they would normally sit, will give you an instant boost. You could also try finger drying your roots. Using your hairdryers  medium heat setting, remove your nozzle and hold the dryer quite close to you root, while massaging the scalp with small circular motions. “Root Boosting” sprays do work, but only if your blow-drying in the right way. If you spray your roots and dry them flat, that’s how they will stay! Once these lotions are dried into the hair, they set.

I loved the root boosting spray from Avon and was distraught when the company finished up, here in Ireland. Now I use, Extreme Volume Root Lifter by Osmo. Once you have gotten some lift into those roots, follow on with drying your mid lengths and ends with a large round ceramic brush.


*An Extra Lift.

Velcro rollers are a must have for every girl out there. The bigger, the better. I usually follow on from blow-drying, by putting some rollers through all of my hair, however, if you only have one pack, place them all around your crown area, give them a really light spritz of hairspray (not too much if your planning to backcomb), and leave them in for a minimum of 10 minutes. I usually leave them in while I am putting my make up on. I use Elnett Hairspray, its nice and light and can be brushed through easily.

Always be aware of the way hairspray actually works. Yes, it holds the hair in place, but if you are in the rain or anywhere with humidity, i.e. a nightclub, your hair will probably get wet or frizzy! When your hair dries, the hairspray actually resets itself, so if your fluffy, you will stay fluffy! Keep the really strong hold sprays for upstyles, full buns and curls.


*Backcombing the Easy Way.

When you have removed your rollers, take the entire crown area and clip it off. Decide where you want to begin your bouffant from front view. Take the first section, starting at the front and put it to one side. Don’t backcomb this section, as you will need it to cover up you “puff” later. Continue workin from the front, towards the back. Take sections of your hair and hold them up, tightly with one hand, while using a large toothed comb or backcombing brush, to brush the section that your holding, back towards the root with the other hand. Go right against the grain here, when you have about an inch of tangled mess, give it a light spray, throw it forward and continue onto the next piece. It is optional, if you want to backcomb every piece of hair on you head, I tend to just stick to my crown area, then I spray some hairspray onto my finger tips and massage it into my roots underneath and around the front of my hair. This holds the root lift that I would have already created with my blowdry and velcro rollers.

When you have finished all your backcombing, throw it all back, along with the smooth section that you left at the front when you started. Brush that section back over the rest, using a paddle brush. These brushes are really soft and wont pull out all your hard work, or tufts of tangles ;-). When you have covered up the messy bits, give another light spritz of hairspray and off you go.


Image


*Holding onto That Body.

No matter what, when you are out for the night, you always feel that your hair had gone a bit flat! 2 of my handbag essentials when I am wearing my hair full are a pen, and Osmo Powder dust!

When you run into the bathroom to top up your lip gloss, simply sprinkle a small bit of powder dust onto your roots to dry up any humidity damage,( i.e. sweat), give your hair a good old ruffle and shake to make sure its spread evenly and absorbed fully. Then stick your pen right into your backcombed area and lift. This will give you a fresh boost of fullness and make sure you stay looking fabulous into the early hours of the morning. x

Day 2. Hair Extensions!

For my second Hair blog, ive decided to do a feature on hair extensions. The difference between hair and methods available and how to best care for them.

I just got my microbeads installed yesterday. This is the third time Ive gotten them. I usually install them myself but a friend of mine, Aidee who owns TanTilleyes beauty salon also does them so she put them in for me. It was so nice to sit and have my hair done, I always do my own hair, cut, colours, the lot. I trust Aidee 100%, so I was delighted to have her put them in. I find she does them similar to the way that I would,(basially, not by the rulebook), and I am delighted with the results.

So many of you out there, wear hair extensions now. I cannot believe it has taken so long to be so popular!
I started training in extension installation 13 years ago!! Of course, the first method was plaiting. Incorporating 40 inch strands of hair into your own, using the method of a four piece plait, sealed at the tip with glue, or a beaded clamp if I was lucky! That glue burned like hell and there were no silicone pads for protection back then!
It used to take hours upon hours to complete a full head. I will never forget standing in the salon, my feet aching and my fingers, numb for 6 or 7 hours, 4-5 times a week doing this. Also, the hair was no where near the quality it is now. It was more fibre based, which was worse because my finger tips would be swollen with paper cuts by the end of it. Even with all the pain and heartache it entailed, I still loved the end result.
Hair extensions have come a long, long way since then. There are various methods and hair types now available, thank god!

I opt for microbeads as they have little or no damage on your own hair. Tiny beads are used to clamp a ‘shoelace’ tipped strand onto your root. I use 100% Spanish hair from Heavenly Hair (previously known as Halo & Hair). Their hair is amazing and I would never use anything else on myself or my clients. I have used the same hair for my last 2 heads of extensions, taking it out and reinstalling. The quality is amazing and their strands are thicker than the basic, therefore last longer. I also use their beads, as they are small but really strong. They are so simple to remove too. For my haircare, I use Mane ‘n Tail products. I posted a review on these yesterday. Installation can be done in as little as 40 minutes and removal, in a mere 20 minutes. I have mine tightened after 6 weeks and remove them at around the 12 week mark.

Another method is using Keratin glue and loose bails of hair, also known as bonds. Basically, the hair is divided and glued to pieces of your own at the root. Pre-bonds are similar, only the glue has been previously applied and dried to the tips of the hair and is melted onto sections of your own hair, at the root area. I had these lots of times before microbeads came out and loved them for the length, but the shedding was awful! Because the glue melts a little with the heat of your hairdryer, or hot water when washing, the hair comes loose and falls away easily. They also leave the hair quite matted, as the bonds soften and stick together, or stick to other hairs around it and reset. They are also an absolute nightmare to remove. Each piece of glue has to be soaked in acetone and peeled from the hair. It can take up to 5 hours to remove these and leaves your hair broken and dried out. I actually cut mine out last time, from the root, along with my own hair which left me with half a head of my natural hair and it has never been the same since. I would never go back to these! Bonds can last from 2-4 months, although it is recommended that you have them removed after 10 weeks.

Another method, used commonly in Ireland, is Tracking. Otherwise known as ‘Sewn In’. This is when the natural hair is braided tight to the scalp and sewn down. From there, a weft of hair is then stitched tightly into the braids. This method can last up to 5 months, depending on hair growth. It actually gives the natural hair time to soak up some of the scalps natural oils, but can leave a lot of matting!

The most important thing to consider when having extensions done is, if it’s just occasional or if you are prepared to keep up the installations. If its just for a short time or a one off occasion, opt for whichever method will do the least amount of damage to the natural hair. It can take a long time to repair and regrow hair that has been broken, close to your root area.
Another thing is, always use 100% human hair. I find Spanish is best.
A lot of hair available to buy is Remy, or Indian hair which only contains a certain amount of actual human hair. The rest is made up of fibres, which wear and tear very quickly. So although your hair might look fabulous when it’s freshly done, within 3 weeks of washing and styling, it will become frizzy and really dry.

Here are a few tips on maintenance that will, hopefully, help you get the best results from your new tresses…

*Use a paddle brush! Similar to a brush used for grooming horses, the brush has a sponge like base and nibbed silicone tips. Brush the ends through first, and then move closer to the root.
*Choose your shampoo wisely! Use a good quality, moisturising shampoo. Avoid rubbing it onto your scalp in circular motions. Instead gently massage it between your beads/bonds and make sure you rinse well. A residue can cause dandruff or an irritated scalp.
*Use a good moisturising conditioner too. Apply it to the mid lengths and ends only! A heavily concentrated conditioner may make your beads slide down the hair shaft so I would recommend avoiding the root altogether. The root of your hair gets enough moisture from your scalps natural oils anyway.
*A leave in Conditioner is optional, but I always spray a small amount through my ends to ensure a smoother blowdry. A detangling spray is fine to use too, just don’t overload the hair. It will give a really heavy, dull finish to your hair. Spray lightly through the ends.
*A heat defence spray is recommended before using a straightener or wand etc. Bear in mind, they all do the same job so don’t spend a fortune. Boots own brand is really good.

Lastly, you can use whichever serums, sprays etc. that you would use in your own hair. It’s perfectly ok!

P.S. I am aware of these new tape extensions, but as I’ve never tried them, I wouldn’t like to claim that I know anything at all about the installation or results that they give. I hope to give them a go in the very near future and let you all know how I got on. x

20130507-141146.jpg

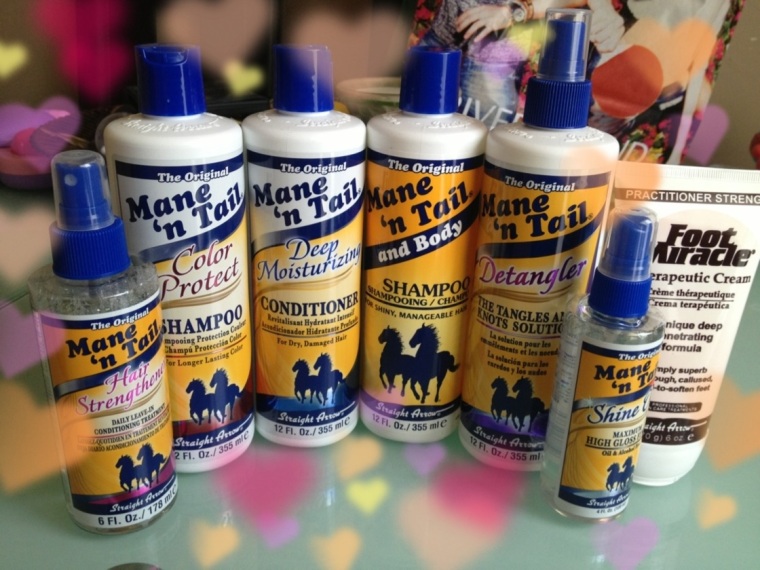
My Must Have Hair Products. No.1 Mane ‘n Tail.

Mane ‘n Tail started off with 2 products, original shampoo and conditioner. They had been created for show horses, to give that perfect shine and smooth texture to their mane and tail, but when horse owners started to try these on themselves, the brand exploded.

Mane ‘n Tail hold the promise of stronger, longer, healthier looking hair by nourishing, fortifying and conditioning your hair and scalp.

Hollywood’s finest are now big fans of the brand. Why wouldnt they be? Have you seen show horses? What woman would not want that long, flowing mane?! I certaintly did! And so the trials began!

Mane ‘n Tail kindly sent me out a box of samples to try. I was doing some salon demo’s that week so I decided to hand them out to some of the staff and clients, looking forward to hearing some real feedback. I covered every hair type and texture and gave each girl, an original shampoo & conditioner and a herbal essentials shampoo & conditioner.

Within 3 days, I was literally bombarded with texts and calls, asking where they could purchase the products, if there were any serums etc, in the range, and giving me their amazing feedback. Every single person that I had given samples to, loved it! They wanted more for their family, friends etc. and couldnt wait to spread the word.

The feedback I recieved was 100% positive, that was within around 30 women.

The original shampoo and condition seems to be more suited to thick, frizzy or coloured hair. Hair that would need an extra bit of T.L.C. It gave results from, literally, the first use, leaving the hair smooth and sleek with a high shine finish.

The Herbal essentials range is more suited to fine hair, or someone that would have dry ends, but oily roots. This too, gave results from the first use and left an amazing result. Clients also said that they got longer between washes as their roots stayed fresher for longer which is amazing for any of you who would have your hair professionally blowdryed once a week.

As I was literally stripped of all my sample packs, Mane ‘n Tail sent me a big box of fabulous products to try myself, that was 4 weeks ago, myself and Cealeigh have been having a ball, trying it all out since.

I have hair extension in at the moment and Cealeigh (my 14yr old daughter), has really long, thick coloured hair.

I brough Cealeigh in on this trial as she is a trained show jumper and knows the ins and outs of preparing a horse for show. She would really be the perfect little person to know if these products give the same treatment, texture and results to human hair, as they would to horses!

I started using the Original range and it has been amazing. Hair extensions can be a nightmare to maintain if you dont use the right shampoo and conditioner! They matt and tangle and you can loose microbeads from the vigorous pulling, trying to brush it out.

These products made my hair a dream to manage. It was so easy to comb through and blowdry or style and the hair itself, looked absolutely amazing. Their was no frizz, no dullness. My ponytail, honestly looked like it belonged in a competition! Everyone commented on how healthy and thick it looked. I am still amazed. I can never see myself using any other brand on my own hair. I love it!

Cealeigh used the products from the Colour Protect range. This range helps protect your colour, while deeply moisturising the hair. It wont strip or fade your colour, like a lot of other brands do. I applied her colour before she started to trial the products. Her hair is a deep burgandy which usually fades really quickly due to blonde hilites she had last summer which made her hair very porous. The colour hasn’t faded at all! Not the tiniest bit! She loves it! The products also leave her hair much easier to manage, and it looks so much healthier and smoother when she blowdrys it.

Last weekend, my shampoo mysteriously went AWOL! Unknown to me, Cealeigh had taken it with her to the stables, deciding that the horse she looks after needed to have a try too!!
She came home on Sunday, with a few pictures of Abdullah (the horse!) post-treatment. Needless to say, I was not impressed that she used a half bottle of shampoo and conditioner on a horse, leaving me with nothing!
By mid week, I had to admit that it was the perfect way to round off a trial. I have seen the products used for all their intent and purposes now. The horse did look fab! And in her words “you gave me a job to do mam, I was just doing it properly”! She was, as much as I hate to admit it, right!
The owners of the yard are now getting it in for all the horses that they will be showing in the RDS in August, and Cealeigh will be there on top, with her long flowing shiny mane to match her horses!
And of course I will be looking on with perfect tresses of my own. x

You can view the entire Mane ‘n Tail range at http://www.originalmanentail.com
You can also purchase at selected retailers.
I have more of the Mane ‘n Tail Range, which I will be reviewing over the course of this week.
I love the products so much, I thought,they each deserved their own recognition. My favourite brand by a mile!! I’m completed converted.

20130506-114443.jpg

Day 1, Me and Hair, How I got here x

Hi Girlies,

Before I started my hair blogs, I thought I’d tell you all a little bit of something about me, and my background in the hair industry. As you all know I am also a makeup artist, nail technican and soon to be fashion stylist, but hair is my real passion. It’s like second nature to me. My scissors is my second skin, my 6th finger. I am never without it! So here goes……

I am a hairdresser by trade. It’s what I have wanted to do since as far back as I remember. From a really young age, I was obsessed!
I remember watching television around Christmas time, when I was probably about 3 or 4, and asking Santa for whatever doll had the longest hair. By 4 o’clock, Christmas Day, that doll would have a bob and a fringe!! Along with my 2 cousins gorgeous new Barbie’s. My auntie cursed me for years after that, every time the girls got dolls, I found a way to cut their hair! I just couldn’t help myself. If there was hair in front of me, I had to cut it.
My mam started giving me old clothes to cut instead, which resulted in her wedding dress being cut up to shreds to make a cover for my dolls pram. She was sorry then, that she didnt just buy a few hairy dolls in the pound shop and leave me to it!
I also remember back when I was about 7 years old, my mam being called to the school because I wouldn’t do my work. Whoever was sitting in front of me would leave school at the end of the day with a head full of plaits. I would make up my own, using more pieces as I went along. I couldn’t keep my hands from hair long enough to write.
From there, the obsession with hair kept growing. I butchered all my friends and used to make them sit for hours and hours while I created my own upstyles.
Finally, when I was 14, I got a Saturday job in a salon. I loved it! I would get the bus there after school every day and just sit and watch the stylists work.
A year later, I left school and started my training. I would drive the owner mental with all the questions and my own opinions on how to cut and colour. I didnt want to be the same as every other stylist out there, I wanted to take a visual approach rather than a technical one and put my own stamp on my own work. It paid off and I qualified within 2 years.
I switch around salons after that, done some teaching for a while and took a managers job for about 3 years.
It’s hard to believe that it was 13 years ago, that I stood doing my first head of hair extensions!! It has actually taken years for hair extensions to become so popular!!
8 years ago, I started working with bridal magazines and on photo shoots. It was to keep my mind fresh, more than anything else. It meant I had an outlet, where I could be more creative and get away from the usual salon work from time to time.
I love being out there, mixing with people, giving them confidence in the way they look and feel about themselves, so I decided to go freelance a few years ago.
It was the best decision that I have ever made.
It means I get to do what I love, spend more time with each client, cover lots more weddings, debs etc. and can still fit some shoots in too.
I do miss teaching though, I have to admit, and I think I may look into going back to it on a part time basis but we will wait and see. Whatever is for you, won’t pass you by.

It will be 20 years, this year since I first stepped out onto a salon floor with high hopes and only dreams of being where I am today.
I’m 33 years old now and Im still learning. When you work in this industry, you can never know enough! There are so many other, talented people out there with so much knowledge. I would never claim to know absolutely everything! I like to think at this stage, I have a pretty good insight, but I am always eager to learn, to better myself and my work.
However I am 100% confident when it comes to my career and being capable of doing the best that I can do.
It’s the one aspect of myself that I have never doubted, and never will.
I am so lucky to have the opportunity to wake up every day and do what I was always destined to do, and what I will always love to do!
If the day ever comes when I say to myself, I don’t want to do hair today, I will pack up my things and never work again. I believe the reason I am good at my job, lies in the passion that is behind it.
If that passion ever stops, then I will too.

So I have decided to incorporate this into my blog for 1 week. A different aspect of hair care and styling every day, for 7 days. To share my knowledge and hopefully, help a few of you out with your hair issues along the way. Hope you enjoy it.
Xxx

P.s. My blog and more can also be found at http://www.facebook.com/pinksugarsparklie so pop over and have a look.

20130506-093216.jpg

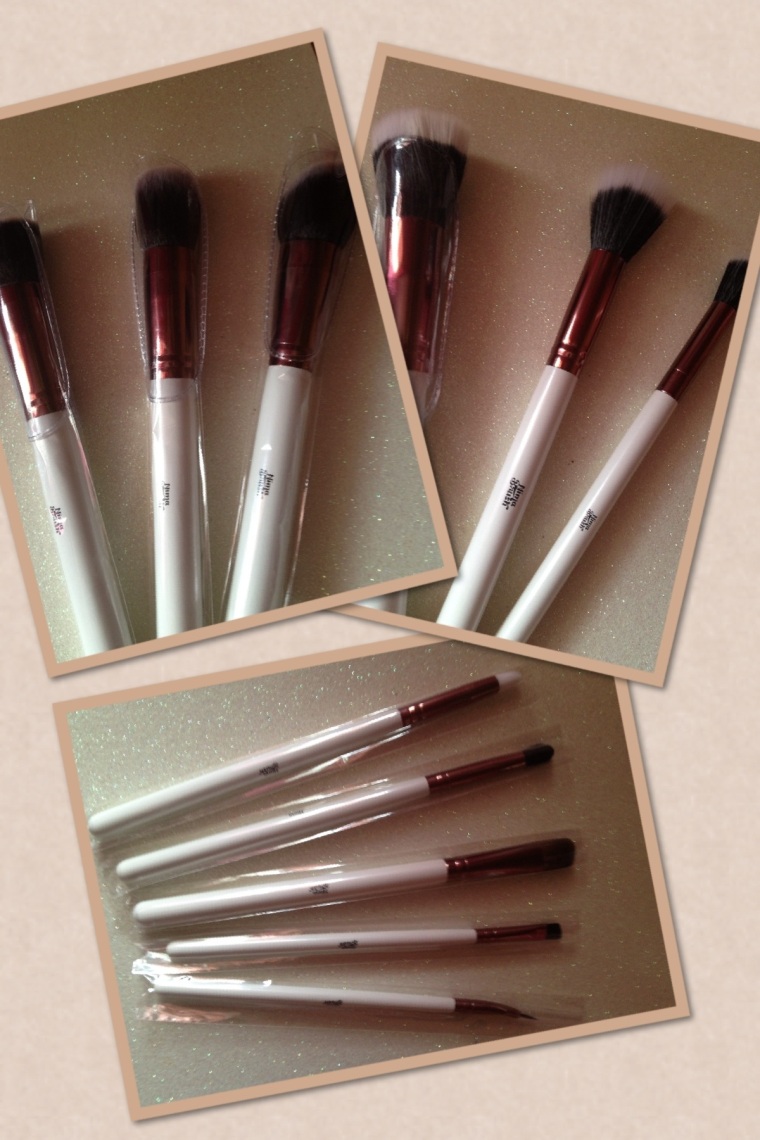
NIMA Elite Collection Brush Set

So, after I had trialed the last NIMA brushes, I couldnt wait for the new Elite Collection to be released!
I had poor Niamh Martin scourged, until I met up with her 3 weeks ago and finally got my hands on these beautys.

I got the entire set!
3 piece Duo Fibre,
3 piece Kabuki,
5 Piece Eye Detail set.
And a fab new pink cylinder to home them, of course..

I couldnt wait to try them out.
What I didnt expect was the terror I faced at the thought of unwrapping these beautiful, perfect, rose gold and white make up tools when I got them home! I just couldnt do it!
I did realise that these brushes are, after all, created for make up application, but I just hadn’t got the heart, to tarnish their prettyness! And so they sat, perfectly displayed, for all to touch and admire, in my work space, for 3 whole weeks! I did try, once or twice to unwrap a crease brush and give it a go, but it just never happened.
Anyway, due to a major shoot at the weekend, I had no choice but to unveil my new babys. I needed all tools on deck for this one, and so they were unwrapped, and put to the ultimate of tests!
And my friends, they were worth every second of the wait!

Every single one of them, so soft and fluffy. Like little clouds sweeping across the skin. Each with the same perfect precision, as the one before.
Every one of the 6 models that I used them on, remarked how soft and gentle they were.
I came home and got to cleaning them, a little disheartened that they would loose their “newness”! They didnt! In fact, when they had dryed out, they actually felt softer and fluffier than the days before.
Amazing!! But, sure, what else should I have expected! NIMA brush are a fantastic creation, and a definate must have for any girl!! I want another set already, just for back up, well maybe for display, i admit it!!

My current set will be staying exactly where they are! Right in the front row of my brush belt, taking centre stage on every makeup job that I do from here on in.

The verdict? As I said before, a must have! This brand of brushes are better than anything I’ve ever used before. So affordable (and slightly addictive) too.
Pop over and have a look at the collection and more at http://www.nimabrush.com where you can buy individual, 3 piece sets or the whole collection. Do it, now! It will be an investment, they will last forever!

20130501-141953.jpg

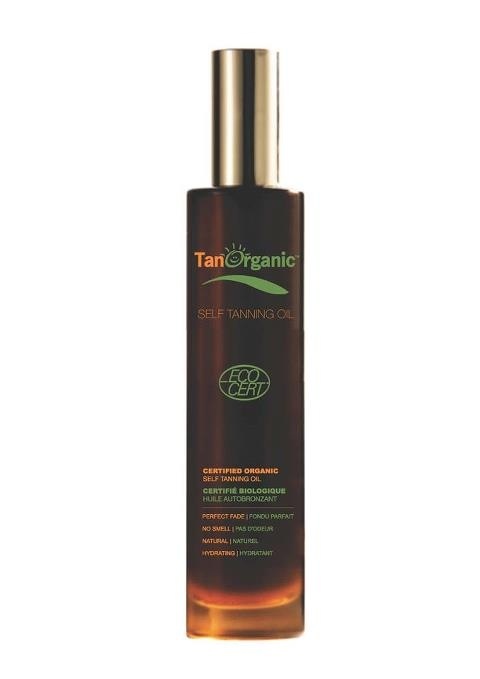
TanOrganic Self Tanning Oil

20130425-145337.jpg

A couple of weeks ago, I received a beautiful gift from Tan Organic of their Self Tanning Oil and one of their Tan Eliminating Mitts.

I used the mitt straight away and wrote my blog on it the following day. You can find it in my list of articles.
The tan, I held off on using until last weekend. I had heard that it was quite pale and as I have quite a sallow complexion, I like a dark self tan.

Well, I have no idea who it was that started that rumour mill! Fact is, the results were the complete opposite.

I applied the tan on Thursday night. One full body application using a mitt.

The oil is really luxurious and and hydrating on the skin. Its made with a blend of plant oils including Argan oil and Orange peel oil, and has a gorgeous citrus fragrance!

I sprayed it all over and blended in with the mitt. I didn’t overload the oil on, as I was really eager to see the result of one coat.
The oil is clear coloured so there is no tint when you apply it.
I couldn’t believe the colour that I woke up with next morning. I was an absolutely, beautiful, deep golden brown. I did wince getting in the shower in case I faded, which is the case with a lot of self tans. The water rinses you up to 2 shades lighter, but I am delighted to say that I stepped out with exactly the same colour that I had woken up with!! My skin felt really soft too, so I just gave myself a light moisturise.
The colour was completely even, all over. No darker spots on my drier areas. I loved it!!
My tan lasted 5 days and the wear off was great! No spots or stripes at all. It just gradually faded.

It’s the most natural tan I have ever used and looks as close to a real holiday glow, as your ever going to get without spending 2 weeks in the Caribbean!

I cannot wait to try another amazing product from the Tan Organic range, Oil Organic!!
Can be used on hair, nails, scars and stretch marks! How brilliant is that!! All my weak points treated from one bottle?! I will of course, bring you all a full lowdown as soon as I try it out.

To view the whole Tan Organic range, or purchase online, just log on to http://www.tanorganic.com

A guide to Perfect Tresses

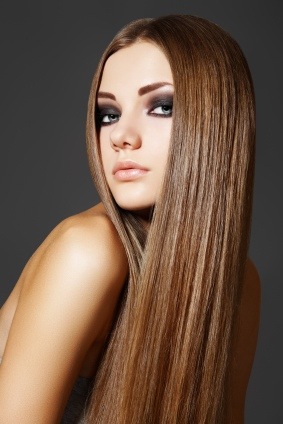
So, with summer coming (hopefully), what better to go with your beautiful sun kissed glow, than shiny heathy hair! (Or the illusion of shiny, healthy hair!)

I’ve composed a little guide on how to get those locks sleek and summer ready.

*Shampoo…
Shampoo is an essential start to hair care, especially in the warmer weather when you would wash your hair more often.
For curly/frizzy/coloured hair, I would highly recommend Mane ‘n Tail. As it was firstly created for horse hair, it’s deeply hydrating and leaves the hair super soft with a high shine.
For really fine/flyaway hair, Dove shampoo is amazing. It’s high in moisture but gentle on the hair. It won’t leave any residue, or make you feel like it needs another wash, which sometimes happens if you use a heavier, more concentrated shampoo.
If you have blonde/brunette/red hair, the John Frieda range is amazing! It enhances your colour and the platinum shampoo really gives blonde hair a boost, keeping those brassy tones at bay.
Always be aware though, with most blonde shampoos, they will cause a fade in any darker colours, so if you are blonde with some lowlights, have them done a shade darker next time. That way they will fade to the perfect shade and won’t end up disappearing altogether.

*Conditioner
I would always recommend that you use the conditioner that is matched with your shampoo. These products have been created to work together so mixing them around may take some good away from each, leaving you with dry or dull hair. One exception, is of course using a conditioning treatment.
A treatment should be used no more than once a week, even when treating the most damaged of hair. Using it more often will only end up leaving a tacky film over your hair, making it appear lifeless and dull. When treating the hair, warm a towel in the microwave and wrap it round your head while the product is on. Heat opens the hair follicles so this will help achieve maximum results with the product that your using, absorbing more into the hair. A regular conditioner left in the hair while in the sun is also a great treatment for your hair! *Bonus Tip* For curly/wavy hair, conditioner can be used as a serum!! Apply when wet and comb through, Leave to dry naturally or lightly finger dry..this will eliminate all frizz!!

*Serum
A serum can be used on wet or dry hair, regardless of what the bottle says! Always use a small amount and heat up in your hands before applying. This will ensure that the product is applied more evenly and sparsely. Never apply to your roots!
A shine spray is great if you find that serums tend to make your hair flat. Always hold the bottle 6-8 inches away from the hair when spraying. The product will then fall evenly and lightly over your hair, leaving a beautiful, healthy shine without adding any weight.

*Tips for Styling
Never blowdry hair from wet! Instead, blast it near dry with your hairdryer, then start to section off and smooth with a ceramic round brush, point your nozzle downward and follow the brush from root to tip! This will avoid “over drying”, which causes frizziness in dry hair and will make fine hair, flyaway.

*If you have a “calves lick” or “jump” around your hairline, pull the hair in the opposite direction to the way it naturally sits when your blow drying. Then brush flat, with your normal parting.

*The cold air setting on your hairdryer DOES actually serve a purpose! When you have blowdryed your hair, give it a blast of cold hair. This seals the cuticles, helping to smooth down any split ends. It also brings up a natural shine. x

20130424-225507.jpg

So there you go girls, just a few little tips for taming your tresses. If it helps even one of you, I’ve done my job. x